
It's finally time to introduce you to my favorite Red Heart pattern to date! Welcome the Cabled Hooded Cowl. Back in February Red Heart contacted me about designing a pattern with their brand new Hygge Charm yarns, a beautiful acrylic line that has a soft halo and subtle sparkle. I immediately began work on the new design. The pale mossy green of the yarn stuck in my mind as I sketched out a few possibilities for the piece. I knew I wanted cables, and decided to play with a new design element I've been working on which I call "Wedged Cables". You will hear much more about the technique down the line, but let this debut suffice for now!
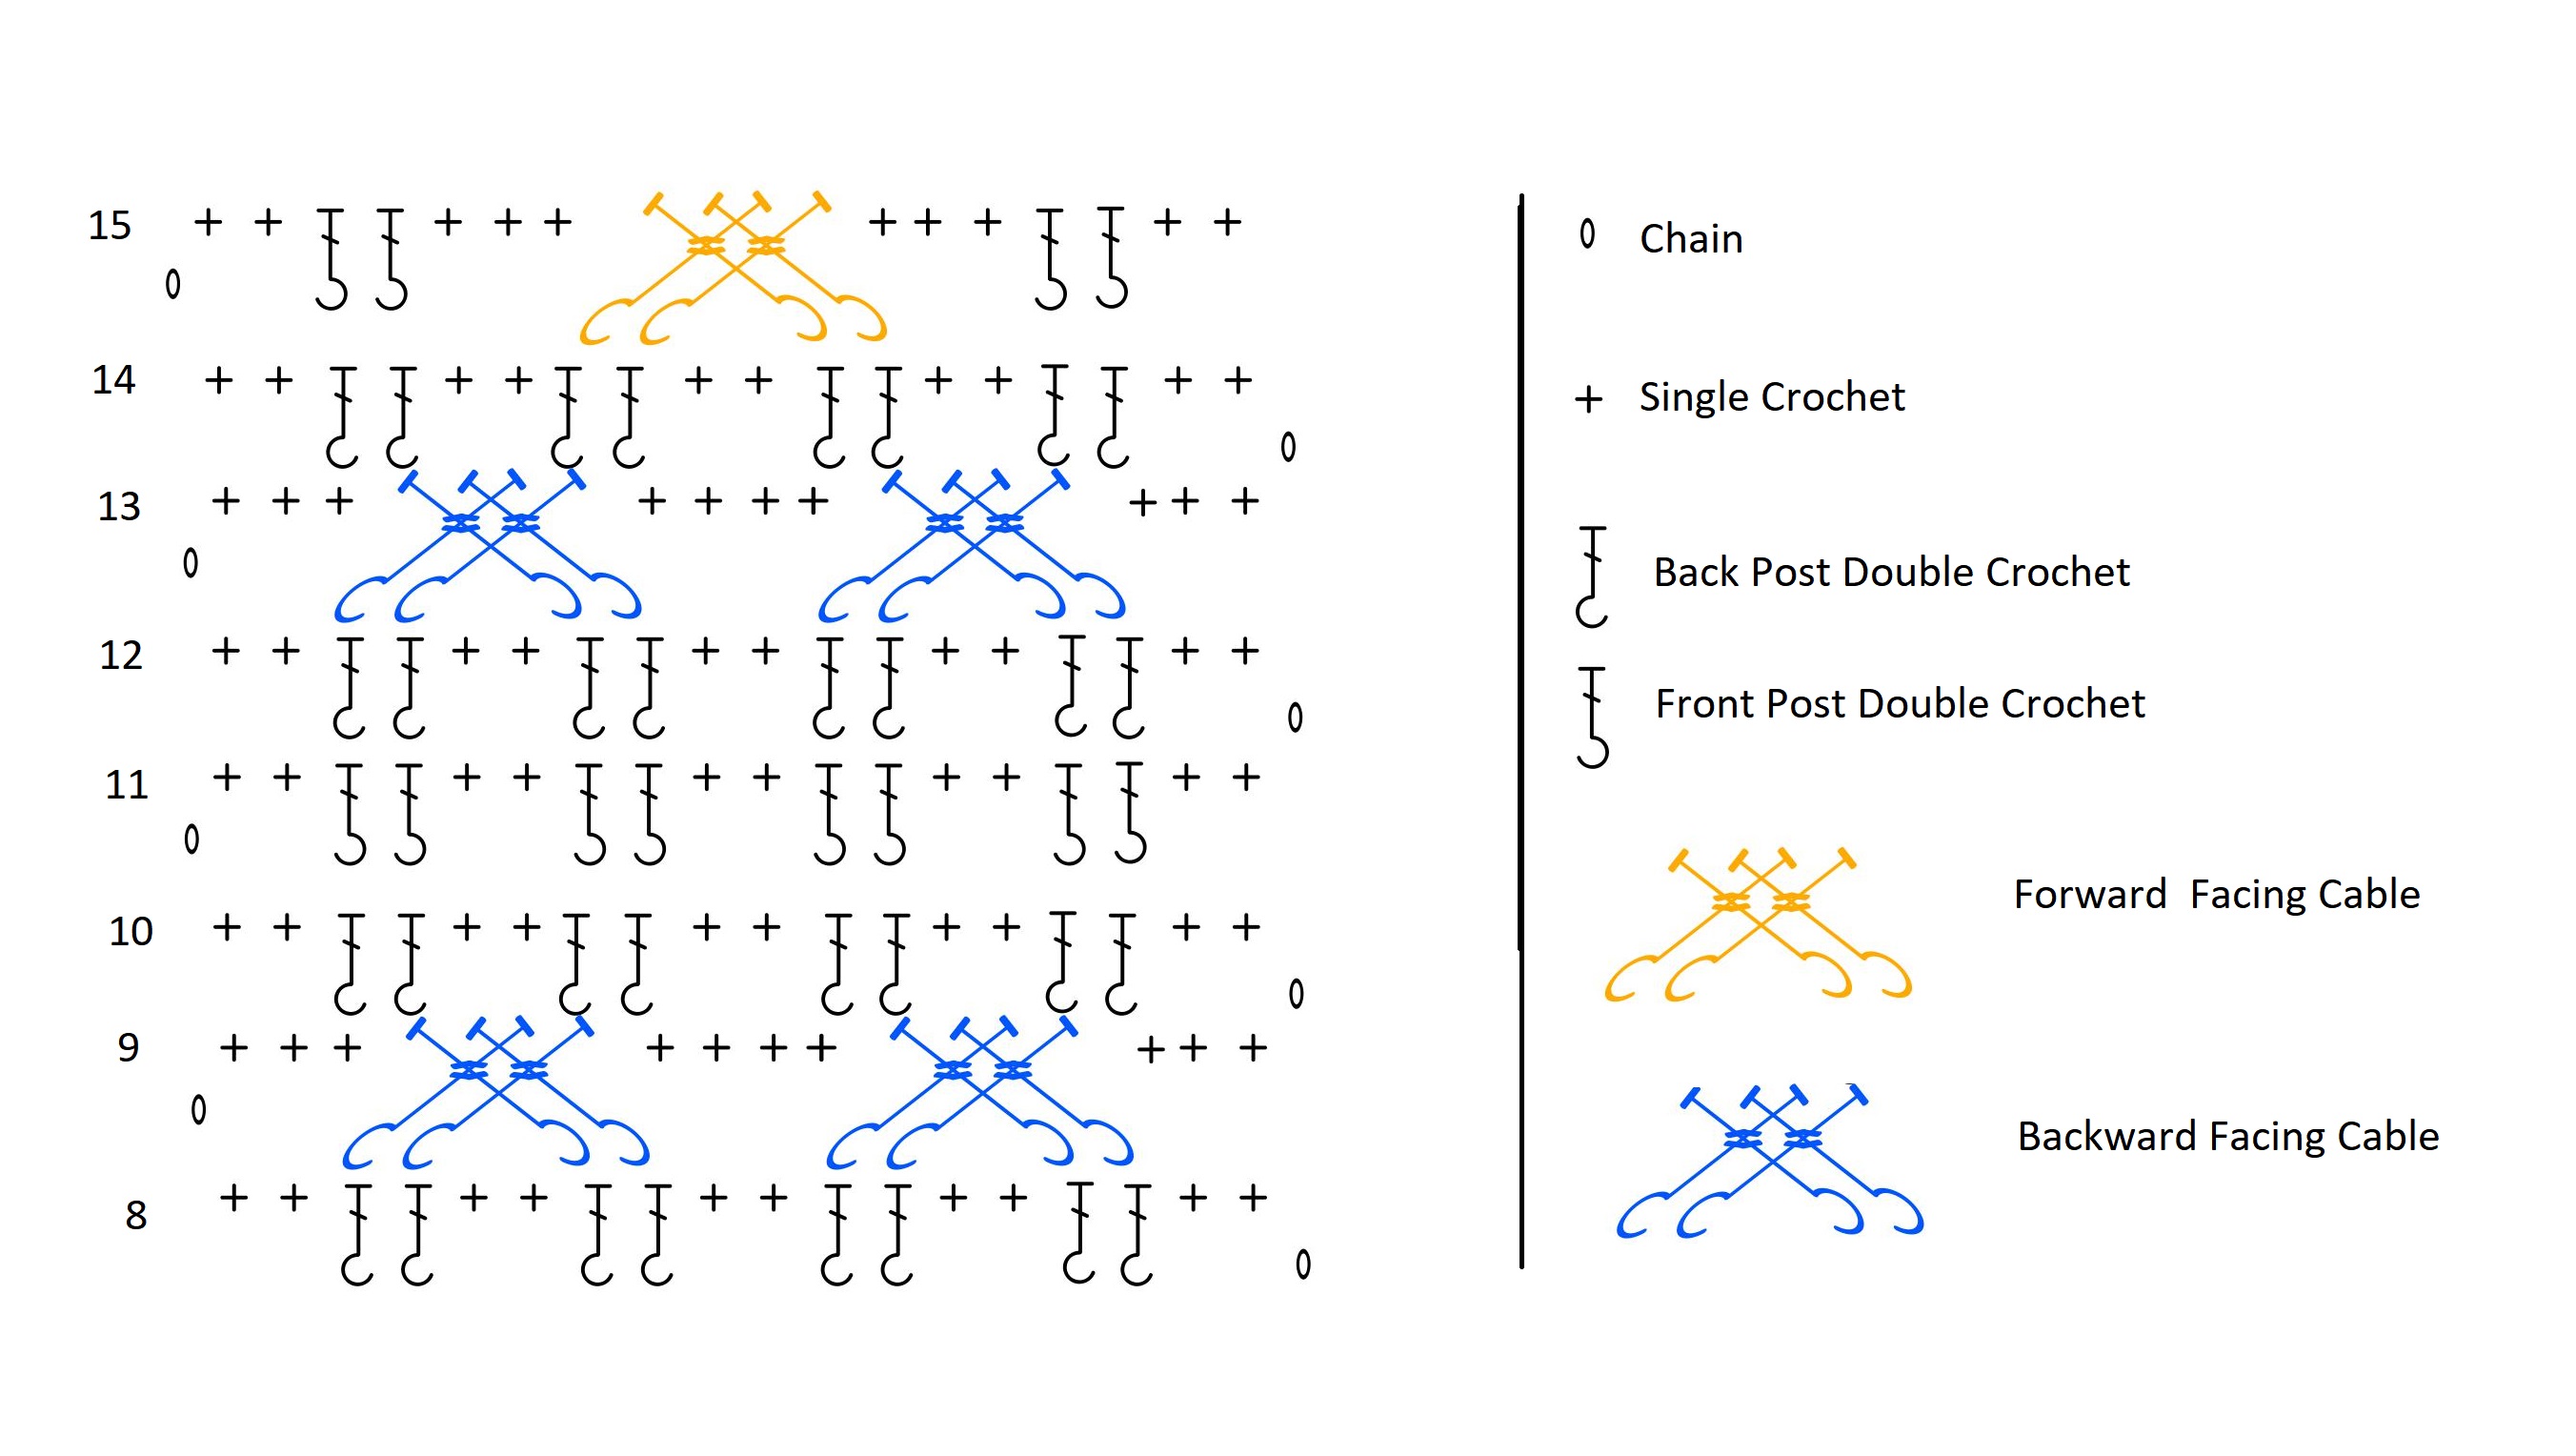
Once I had the cables down, I needed to move on to shaping and structure. Up to this point I had never made a hood, and many of my designs hadn't strayed far from the standard rectangular construction format. To get the shaping and accessory I wanted though, I knew I would have to break my own status quo and challenge my designing skills. I would like to take this time as a moment of silence for all the cotton fabric I destroyed while creating a muslin prototype of the cowl. Seriously, there was a lot. I'm not sure how many other designers create fabric proofs of their crochet and knit pieces, but for me it is a great help. One audiobook and countless yards of fabric later I finally had the shaping I wanted. That is where the Cabled Hooded Cowl was born! As per usual, Red Heart did a phenomenal job with the formatting, tech editing, and photography of the pattern. The one thing that didn't made the cut for the downloadable pattern was the cable chart. If a cable chart is helpful for you, I've left the chart for the Cabled Hooded Cowl as a free errata download below! The repeating cable chart starts on row 8 of the cable section. Get the pattern for FREE here or by clicking on any of the project photos.
7 Comments
10/27/2018 08:10:59 am
Hi,I came on Ravelry from Redheart to get some help to finish the cowl.I used LB wool (maybe a mistake if it shrinks up).I pinned the 2 sides tog to try on and it fits too tight and Im small -sz 6.Now-can I use the cable piece as a center piece between the 2 side pieces? Instead of sewing it on the finished cowl.I think this way would give me 4 more inches? Has anyone done this? I wouldnt want to start over.
Quayln
10/27/2018 08:14:19 am
Hi Cathy! Thanks for making the pattern. And yes. The cable piece is meant to be the center panel and will give you those added inches! Would love to see your finished project. 3/25/2019 03:48:00 pm
You mention “center point” on the finishing part. You mention “A” but I’m still unclear where the center point is. Also is the whole cowl finished off with a sc? Thanks!
Shersher
3/27/2019 01:46:01 pm
I would love to make this but i am unable to figure out the whole cable center
Quayln
4/25/2019 11:02:14 am
Hello! I will be making a tutorial soon over the type of cable used in this project. The tutorial, when published, will be on the blog and on my YouTube channel.
Quayln
4/25/2019 11:00:10 am
Hello Trudy! Yes, the cowl is finished off with a sc all the way around. As for the joins, in the pattern on page 4 is a schematic to show A and B. A is the one front seam and B is the two seams between the cable section and either side. You can seam in either direction (up or down). Leave a Reply. |
AuthorQuayln is the creator behind everything QUOE. Archives
November 2023
Categories
All
|


 RSS Feed